

LED strip lights are a popular lighting solution for homes, offices, and creative projects due to their flexibility, energy efficiency, and customizable lengths. Whether you're installing accent lighting under cabinets, working on an illuminated channel letter or creating a decorative backlight, knowing how to properly cut and connect an LED strip is essential. This guide will walk you through the process safely and effectively.
✅ What You'll Need
Tools:
· Sharp scissors or a utility knife
· LED strip connector (clip-on or solder type)
· Wire stripper (if using soldering method)
· Soldering iron and solder (optional)
· Power supply compatible with your LED strip
✅ How to Cut an LED Strip
Step 1: Identify the Cut Line
LED strips can only be cut at specific points, which are usually marked with a scissor icon or a straight line across the copper pads. These marks appear every few inches, depending on the type of strip.
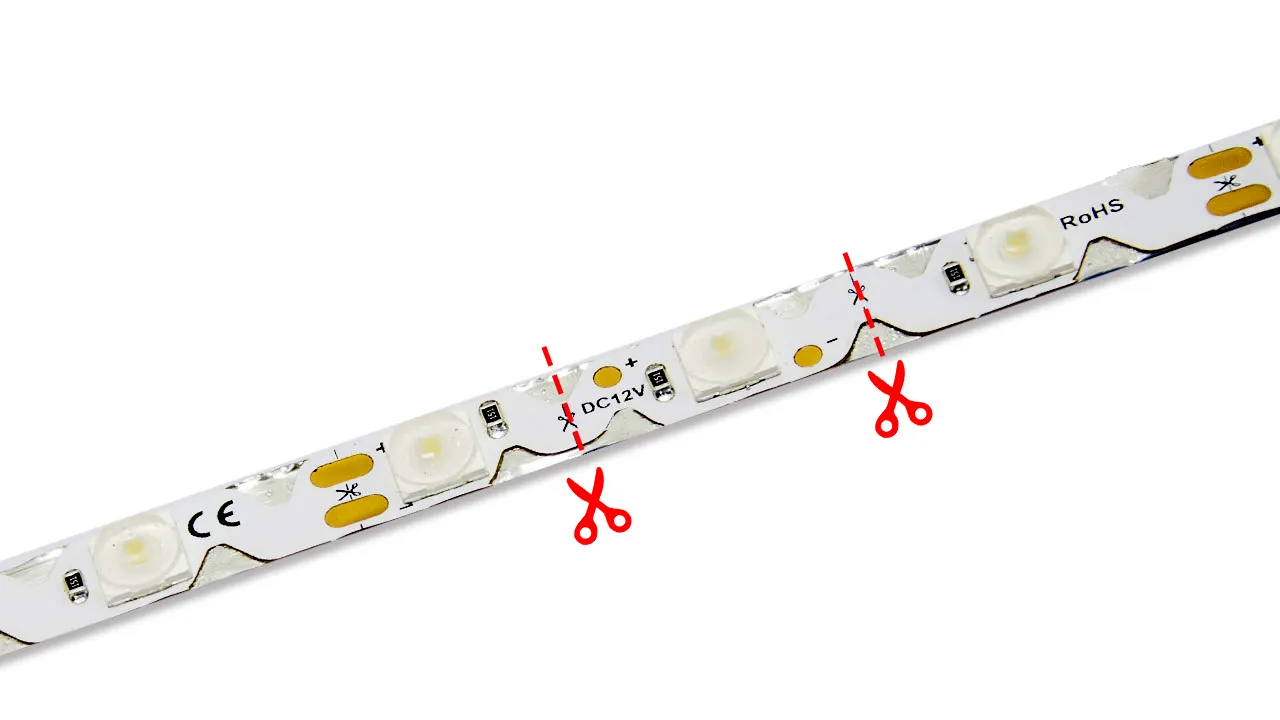
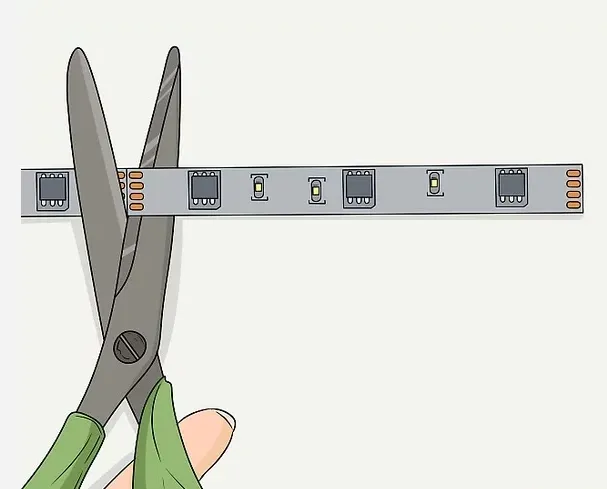
Step 2: Make a Clean Cut
Use sharp scissors or a precision knife to cut exactly along the marked line. Cutting outside of these lines can damage the circuit and prevent the strip from working.
✅ How to Connect LED Strips
Option 1: Using Clip-on Connectors (No Soldering)
This is the easiest and fastest method.

Steps:
1. Choose the right connector (make sure it matches the strip type—e.g., 2-pin for single color, 4-pin for RGB).
2. Open the clip and insert the end of the LED strip into the connector, aligning the copper pads with the connector terminals.
3. Close the clip to secure the connection. You should hear a click.
4. Test the strip by connecting it to the power supply.
Option 2: Soldering Wires for a Secure Connection
This method is more durable and ideal for permanent installations.

Steps:
1. Strip the wire ends (if needed) and tin them with solder.
2. Apply a small amount of solder to each copper pad on the strip.
3. Solder the wires onto the corresponding pads (positive to positive, negative to negative).
4. Insulate the connection with heat shrink tubing or electrical tape.
✅ Plan the Layout
Use a measuring tape to measure the area where you wish to add your strip lights and plan out how you wish to place them. Calculate the length you will need, considering areas that may need extra length added on, such as corners and circular walls.
✅ Prepare the Surface
Clean the surface where you wish to attach the lights, making sure it is clear of any dust, grime, or debris. Use a damp or dry cloth to rid of any dirt.
✅ Connecting to the Mains
Ensure that the power supply matches the requirements for your lights to avoid damage. To do this, check that the voltage and wattage match the LED driver.
Now that you’re prepared, here is a simple guide you can follow for an easy job:
1. Strip the wires: Remember to switch off the mains supply and use wire strippers to expose the ends of the wires on the LED strip and the mains power supply.
2. Connect the wires: Use wire connectors to connect the LED strip wires to the mains power supply.
3. Secure the connections: Use electrical tape to secure the wire connectors or strip connectors for lower voltage connections. For more security, you can solder the wires together.
4. Connect to Mains: Plug the mains power supply into a mains outlet and turn the power back on to test the lights.
⚡ Important Tips
· Match voltage: Make sure your power supply voltage matches the LED strip (e.g., 12V or 24V).
· Check polarity: Connecting positive to negative can damage the strip.
· Use compatible connectors: Not all strips use the same number of pins or spacing.
· Avoid bending the strip at sharp angles; it may damage the internal circuit.
✅ Final Check
Once everything is connected:
· Plug in the power supply.
· Check that all LEDs light up evenly.
· If not working, double-check your connections and polarity.
Conclusion
Cutting and connecting LED strips is simple with the right tools and a bit of care. Whether you're using connectors for a quick job or soldering for a long-lasting setup, this skill opens up endless possibilities for creative lighting in your space.
Recommend our LED strips:

Shenzhen YESUN LED Limited


 INQUIRY